I made this so that I would have something to wear in the mornings and evenings when I'm camping at any events where I can do 1830's and 40's. This is always a huge issue for me when I am doing period camping, as I'm sure it is for many ladies. Before we are dressed, we are exposed and well, frankly, bouncy. It's a distinct disadvantage while running around looking for coffee and brushing your teeth. But of course getting dressed itself is a process, one usually requiring prior caffination.
This pattern is a pretty good one to get you there, but there are a few funny bits you will want to look out for. I also made a couple of alterations for what I was after.
Inspiration and Alterations
My inspiration piece was this dress from the Met
My inspiration piece was this dress from the Met
Metropolitan Museum of Art 1840-45
To achieve this look, I left the collar off the dress, which allows it to better carry into the 1840s. I finished the neck with a piece of bias tape I had cut for the piping.
I also added the belt straps to tie at the waist. I was pleased to see several period examples with these. I'm a pretty busty gal, which makes baggy clothes unflattering. If things just hang off my bust without being cinched back in around the middle it looks like I have no waist. Incorporating these allowed me to tailor the garment to what flatters my figure in a period manner.
These were just 2 1/2 strips which I cut straight on the grain and hemmed on both sides with an angled end. I pinned them to the belt incorporated into the back piece before sewing the sides together.
The pattern called for a single hook and eye at the throat, but I added another at the bottom of the yoke.
(inside out shot to show closures)
Things to watch for and quirks with the pattern
Sizing
This pattern did not come with a sizing chart I could find. I estimated mine as an 18 just based off measuring my back and front and holding those up to the pattern pieces. Luckily it is such a loose garment that you have a lot of wiggle room.
I should have measured separately for my arms. After I had attached the top pieces of the sleeves and I tried them on, they felt just a *bit* snug. I was able to open the seems and add a small gusset to put in some more room, but I could have saved myself some time and trouble by just measuring ahead of time.
Cutting
The pattern calls for 6 1/2 yards of 45 inch wide fabric. I actually ended up with a little over a yard left.
I had to piece the front pieces since they are so wide. I also pieced the back asymmetrically to save fabric, rather than in the two equal pieces the pattern calls for. By using one piece that was one width of the fabric plus a second length of the remaining width I needed, I ended up with a bigger chunk leftover which I could cut other pieces out of. Piecing for the most efficient use of fabric is the period mentality!
Lining fronts
The front lining is attached at the bottom of the yoke and the side seam, but not the center front, and has a drawstring at the bottom.
Floating lining (cue ghost noises)
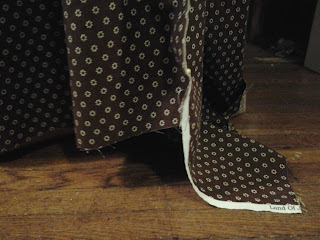
The original pieces I cut out were not big enough on me- I had to add an extra inch to the front and 1 1/2 inches on the side. I should have added an extra inch on the bottom as well to make it meet up with the bottom of the back lining.
oops
I considered not including these since I had the external waist ties, but I kept them in as a way to finish those seams. Instead of sewing them all together into the seams, I folded them on top and hand stitched them in, as you can see above.
Piping
Be sure to cut the bias strips for your piping wide enough that there will be a 1/2 seam allowance once the piping is in place.
I did not do a very good job of this, which made it a bit fussy stitching the belt to everything else, especially on the side seams and the bottom where you will attach the skirt gathers.
Speaking of which- this pattern has some very exacting instructions for making 'cartridge pleats'. I just used my cutting board to estimate 1/4 inch on each gather as I went. Much faster.
Sleeve
The instructions tell you to stitch the sleeves seam 'to the dot'. I sure couldn't find said dot anywhere on the pattern, so I just left two inches before the wrist and that seemed to work out fine.
Et Voila!
I got this done in time for 200 Years on the Ohio last weekend, and it made such a difference in my experience. Having something comfortable to sit around in the morning over coffee with and hang out chatting in the evening with my friends made all the work more than worth it.
If you end up making this pattern, please let me know how it goes in the comments below!
Update 2.16.17:
This this is SO COMFORTABLE, that I have taken to wearing it around the house over my pajamas in the mornings and evenings. It's really wonderful.
I don't think I ever bother to tie down the internal drawstring, the ties I added made it superfluous.
They do wrinkle up very easily and become more string-like, so I have to iron them out again frequently. This might only bother me because I'm a bit OCD, but if I had it to do again I would probably reinforce them somehow.


